hi there, i think someone was asking about how to create the stitch lines in illustrator. creating your pricking iron teeth as a pattern brush is ok for straight lines but not brilliant around curves. Normally i just use a dotted line stroke to indicate where to hit, but having thought about it, here is how to do it. I hope i dont see this on youtube anytime soon.
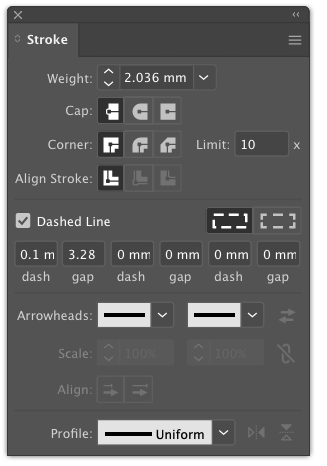
measure the width of your pricking iron teeth using calipers etc. i have some 4z and ks blade to hand and at 8spi they both measure 1.44mm wide. we multiply this by 1.414 and this gives 2.036mm (this is the width of our stroke, as when it is rotated 45º, it will be 1.44mm high.
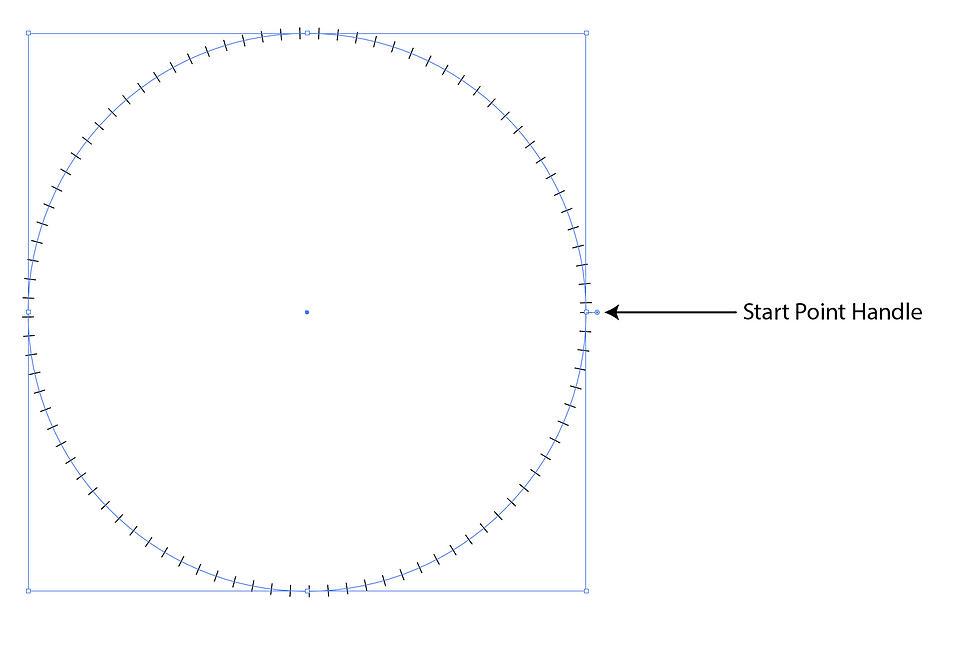
i have made a circle here to show how it works.

and also indicated the start point handle. any short stitches will show here. the stroke needs to be the height of your pricking iron teeth * 1.41, the dash needs to be 0.1mm and the gap is 3.28 (3.38 normal gap minus width of the dash) make sure that it set to preserve exact dash and gap lengths

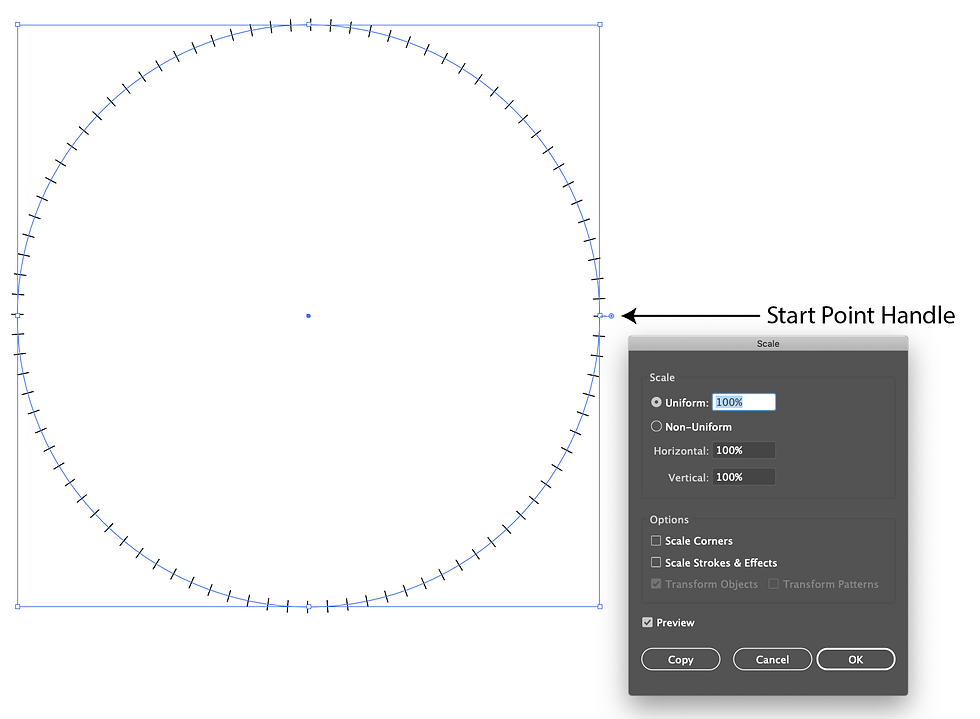
Check to see if you have any short gaps - the one above does, so we need to make it larger or smaller to get rid of this. make sure that in the transform menu, scale stroke and effects is turned off, other wise it will just look the same as you scale up or down. its usually easier just to link the horizontal and vertical sizes and just type in there rather than scaling.

when you are happy with everything. expand the item

now you need to release the compound path and ungroup the elements, as they need to be individual to do the next part.
now we need to go on transform each and set rotation to -45. if we were doing reverse irons, it would be +45

hopefully it will look like the above. i printed an oval and a circle out to check. rushed the pricking a bit as i had a meeting to do, but they match up very well.
one thing to note, is do this when you are happy with everything, as there is no going back. i usually keep a layer of this before i do the expanding and hide it. i also usually have a stroke just set to 0.1mm to show where the centre of the stitch line.

just starting pricking only a couple done.

this is punched, matched up very well.
hope this helps, if you need any other help with illustrator, give me a shout.

Hi Stephen, you are printing it to a pdf there, where does your pdf go afterwards? the print settings look fine there.
can you post a screen grab of your print setting window please - see if anything stands out
Just as a follow up - I concocted a remedy by reducing the printing by a % of the difference between the designed and oversized patterns. It's accurate now, but its a fudge. I'd much prefer knowing how I can print an accurate pattern to begin with.
Cheers,
Stephen
Giving this thread a little bump, I was hoping someone could help me with the settings of Illustrator to enable the printout on paper match the design on-screen.
Long story short, a design I have at 250mm prints out at 246mm and other measurements are similarly disproportionate.
I changed settings left and right to ensure paper in the printer matched paper settings in the computer, reduced bleed to zero, etc. Now its just a little larger than 250mm. It's got to be the settings somewhere - when I use the measure tool on-screen, its perfectly accurate. There's a disconnect somewhere between the page and the screen.
Any suggestions, anyone?
Cheers,
Stephen
hope it helps, just get in touch if you need any help with illustrator.
Thanks a lot, this is really helpful, I just can’t make it work and I guess that with your instructions it will be perfect. Thanks for sharing!
@paul p Excellent advice Paul! Thank you for sharing that with us.